Please note that this page will be periodically updated as I find more tips and take more pictures of doll repair!
Before I even start on the subject of doll care, one of the most important things you can do when you first get your doll, especially if she is new in the box, is to remove her earrings. Most factory made earrings are cheaply made and can leave your doll with green ear. Vintage dolls can have the same problem, but because you are buying them already used, your doll may or may not come to you with this issue.
Green ear is fixable, but it is an annoying problem to deal with. Like with any stubborn stains, such as ink stains , the best remedy for this is Oxy-10 (or any other 10% Benzoyl Peroxide acne cream), lot of patience and persistence. The stain most likely won’t go away on the first try, and at first you may feel discouraged and wonder if this cream is working. It is, but it may take many applications before you will see results. What speeds up this process is placing the doll outside or on the windowsill in indirect sunlight after applying the cream on the trouble spots. Let her sit for a couple of hours, then remove the cream and apply it again. You can also leave the cream overnight. It is recommended to first try the cream on the doll’s back to make sure it won’t cause a bad reaction on vinyl.
With green ear, if it is bad, you can remove the doll’s head and apply the cream on both, inside and outside.
Here are pictures for you to see how Oxy-10 helped this Best Friends Club doll I found at a thrift store with several ink stains on her face.
Before and After
With some vintage dolls you may encounter another scary problem – cracking . Most people won’t buy a doll that has cracks, and who can blame them? Crack repair on plastic is not easy to do, and many websites even say it is impossible to do at home. Actually, depending on where the crack is and how bad it is, you can help your doll at home. I tried several so-called plastic repair epoxies with little success and more frustration. But then a friend recommended that I try PC Woody wood filler epoxy. Even though designed for wood, this stuff is easy to apply and smooth, and after it’s dried, you can sand and paint it. It bonds and it is a filler, and the filler part of it comes in handy if the crack is impossible to push back together.
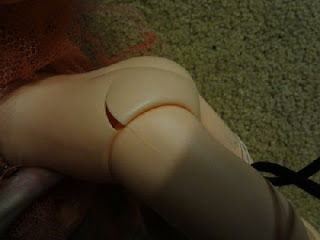
Here are some pictures of before and after with one of my Candies. Poor doll came to me with a crack. As I discovered later on, this type of cracking is not that uncommon among old dolls and they come from too much stress on the joints.
Cloudy eyes can be cured by blowing hair dryer at the doll’s eyes for 10 minutes at a time on a lower setting. Check in between applications if the process is working and if the eyes start to clear.
Washing your vintage doll.
I use gentle dishwashing liquid, cotton balls and Q-tips to get into small areas and to clean the eyes. For hair, rinse the doll’s hair in warm water, careful not to get into her eyes (if they are sleep eyes), spray hair with Windex and work through, then rinse again. If her hair is very dirty, a repeat application maybe in order. Then you can use liquid fabric softener to condition the hair. Fabric softener is a miracle when it comes to detangling a doll’s hair, whether it is rooted or a wig. It does have a strong (detergent like) smell to it though, and not everyone in the family may appreciate it, especially since the smell lingers on the doll for a while. Apply the conditioner on the hair and begin to carefully brush starting at the ends. Be careful not to pull out any strands. Vintage Candies didn’t have long hair, but newer Candies do, and so do many other dolls.
To repaint a doll’s features, use acrylic paints. After the paint is dry, spray the painted area with a sealer.
***
Watch this space. More info to come.....


